Table of Contents
- create Magento Theme
- composer.json
- registration.php
- create 'images' folder
- Declaring the logo size is optional.
- Open 'default_head_blocks.xml'
- Now, Create 'css' folder inside \app\design\frontend\United\mytheme\web
- Refresh your cache from admin->config
- Edit your css
- Add our own div with class or id
- HTML to Magento Theme
- Hide some block
- Move block from one container to another
- To call a custom phtml file (in xml layout , CMS block , phtml file )
- In cms blocks and cms pages
- In a phtml file
- Call Magento CMS block (of admin blocks) to phtml file
- Call Magento inbuilt blocks
- Add a static image on PHTML file and CMS Blocks
Magento 2.0 Has a different theme structure than Magento 1.x.
Like Magento Module ,Magento 2.0 it must have a Namespace/Vendor name to create a theme. You can also download this magento 2 theme for learning purpose from here .
I am Pawan Kumar an experinced freelancer website developer and designer working since 2009. Today we will create magento2 theme from scratch.
Lets take a look app/design/frontend in the folder we will find a folder Name Magento which is the vendor name.
Now we will create our theme in our Vendor Name.
Lets create a directory name 'United' which is our vendor name under 'app/design/frontend'.
under the 'United' directory create the theme that you want .
lets create our theme name 'mytheme'. 
 Select it from dropdown and save the settings.
If any issue with static content deply , follow below steps
Select it from dropdown and save the settings.
If any issue with static content deply , follow below steps note : right click /bin then select 'Open command window here' , before using command ,you must have already installed composer in your system. If you have not installed composer ,download from here https://getcomposer.org/Composer-Setup.exe (for windows)
Now you are with your new theme mytheme !!!!.
note : right click /bin then select 'Open command window here' , before using command ,you must have already installed composer in your system. If you have not installed composer ,download from here https://getcomposer.org/Composer-Setup.exe (for windows)
Now you are with your new theme mytheme !!!!.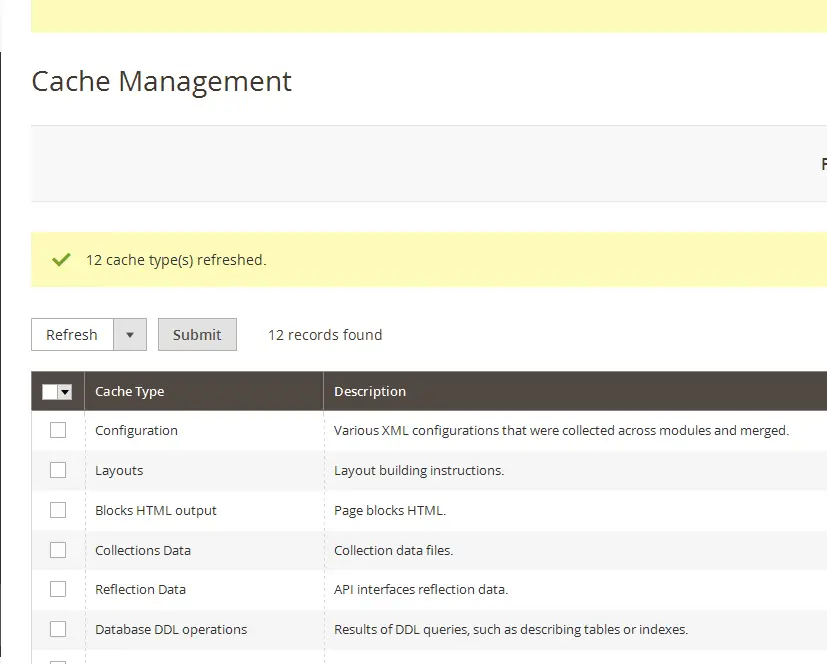 Now , it will show new background color .
note :
Now , it will show new background color .
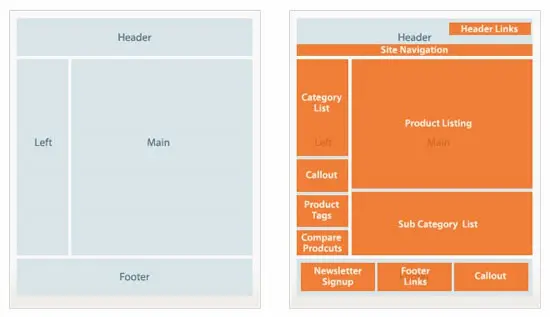
note : 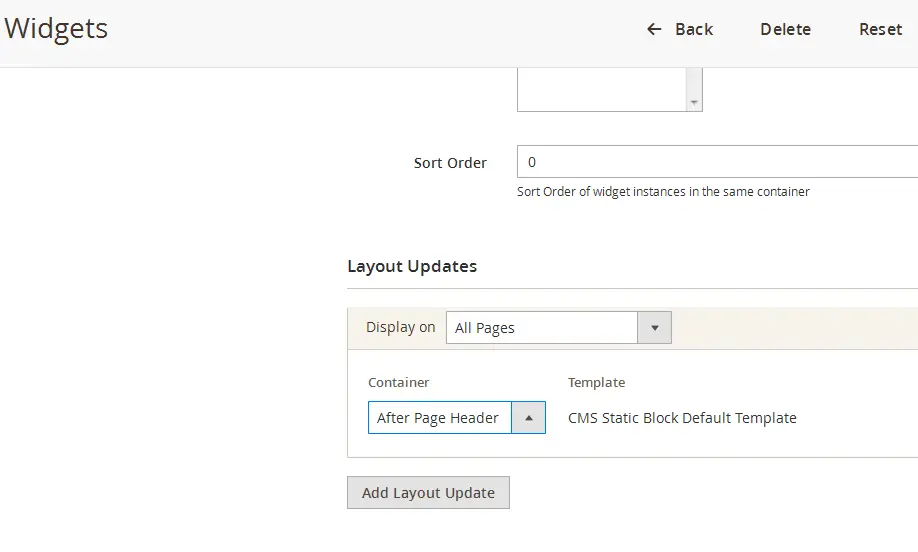 customize global containers/blocks of our theme inside default.xml
located under app\design\frontend\United\mytheme\Magento_Theme\layout\
create global container (for all pages ) ex:
customize global containers/blocks of our theme inside default.xml
located under app\design\frontend\United\mytheme\Magento_Theme\layout\
create global container (for all pages ) ex:
create Magento Theme
We will create our theme 'mytheme' under 'United' directory. Under 'mytheme' directory we will createI am pawan kumar website developer and designer from Delhi, India . I have been working since 2009.
We have been providing Magento advance training that focused on Theme Development and Module Development .So if you want to learn complete magento course , contact us . We provide classroom training on Delhi/NCR ,India. We also provide online class for anyone who interested to become good magento developer or create own magento e-commerce project .
Lets describe the code . 'title' tag is the title of our new theme and the parent them will play as base them in magento 1.x.
Our parents theme located under vendor/magento/theme-frontend-blank.
The new feature of Magento 2.0 is we can use any theme as our parents theme.
after complete the theme mytheme we can create our another them mytheme2 using mytheme as a parents.
add a preview.webp image in media directory for theme preview. composer.json
Now in the composer.json file we will add the following code.registration.php
Now in the registration.php file we will add the following code.create 'images' folder
Now create 'images' folder inside 'web' folder Example: /app/design/frontend/United/mytheme/web/images/ In the Magento application, the default format and name of a logo image is logo.svg. When you put a logo.svg image in the conventional location, which is /web/images directory, it is automatically recognized as theme logo. It is displayed in your store page header once the theme is applied. In your custom theme, you can use a logo file with a different name and format, but you might need to declare it. Declaring theme logo To declare a theme logo, add an extending /Magento_Theme/layout/default.xml layout. For example, if your logo file is logo.webp sized 300x300px, you need to declare it as follows:Declaring the logo size is optional.
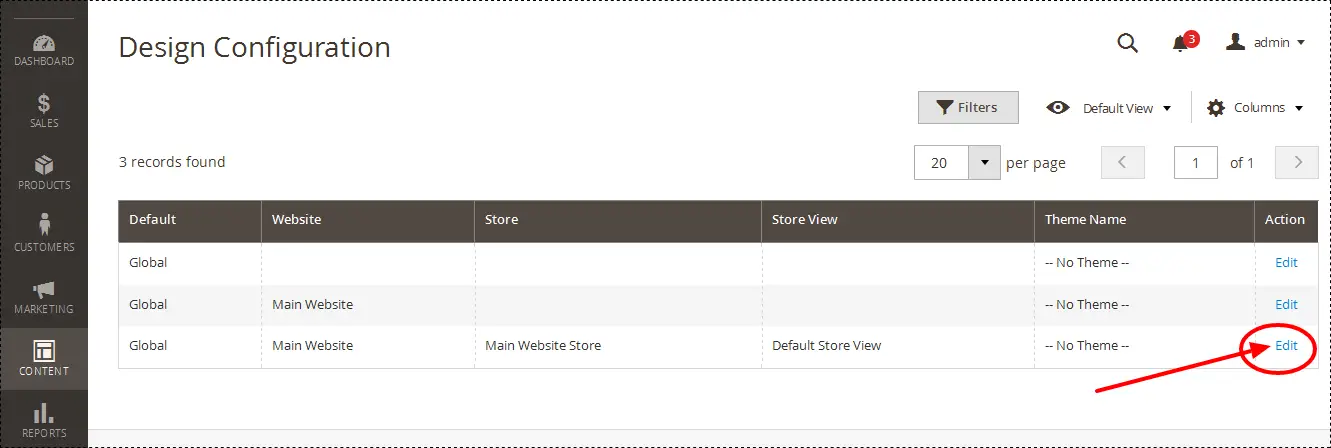
Clear the cache from magneto admin panel. Then From Content->Configuration-> Edit 'Default Store View' Select it from dropdown and save the settings.
If any issue with static content deply , follow below stepsCommand to deploy static files :
php -f magento setup:static-content:deploy note : right click /bin then select 'Open command window here' , before using command ,you must have already installed composer in your system. If you have not installed composer ,download from here https://getcomposer.org/Composer-Setup.exe (for windows)
Now you are with your new theme mytheme !!!!.Add our custom css file
(ref. include css : https://devdocs.magento.com/guides/v2.0/frontend-dev-guide/css-topics/css-themes.html) Copy folder 'Magento_Theme' from 'vendor\magento\theme-frontend-blank\' to your theme folder example path :app\design\frontend\United\mytheme\Magento_Theme Remove 'web' folder from 'Magento_Theme' folder .Open 'default_head_blocks.xml'
found under app\design\frontend\United\mytheme\Magento_Theme\layout and add below code toNow, Create 'css' folder inside \app\design\frontend\United\mytheme\web
After create a file 'customtheme.css' in the 'css' folder example path :\app\design\frontend\United\mytheme\web\css\customtheme.css then put required css ex:Refresh your cache from admin->config
( it is required to deploy static content from command line as described above .) Now , it will show new background color .
note : Edit your css
If you want to edit your css example inside \app\design\frontend\United\mytheme\web\css\customtheme.css, Magento load css from deployed contents resides under pub\static\frontend\\en_US\css\ So, first make changes in this deployed folder then after finalizing it copy this css to original theme location's css (under app/design/frontend/)Understand how magento templates,layout loads
1st default template file is vendor\magento\module-theme\view\base\templates\root.phtml magento 2 builds html structure from xml files next important file to build page-wrapper, columns is vendor\magento\module-theme\view\base\page_layout\empty.xml Then it loads files from below folder according to page request vendor\magento\module-theme\view\frontend\page_layoutCustomizing layout for our theme
Copy folder 'page_layout' from vendor\magento\module-theme\view\frontend to app\design\frontend\United\mytheme\Magento_ThemeAdd our own div with class or id
Now, if you need to add our own div with class or id ,we have to declare inside files as container or block inside app\design\frontend\United\mytheme\Magento_Theme\layout or app\design\frontend\United\mytheme\Magento_Theme\page_layout example inside these files :HTML to Magento Theme
- Copy your css files code to the file created in previous step i.e customtheme.css in our example inside app\design\frontend\United\mytheme\web\css
- Copy your HTML template's images to app\design\frontend\United\mytheme\web\images
- Start customizing files located under app\design\frontend\United\mytheme\Magento_Theme according to our HTML's template div, class requirements . Here we have to add,alter containers or blocks in these files . Explained in above steps of 'Customizing layout for our theme' .
Hide some block
You can hide some block given by magento ex:Move block from one container to another
Sometimes we need to move from one container to another ,So follow below ex:To call a custom phtml file (in xml layout , CMS block , phtml file )
In xml layout file
In cms blocks and cms pages
In a phtml file
Call Magento CMS block (of admin blocks) to phtml file
Call Magento inbuilt blocks
Put below in default.xml layout file ex:Add a static image on PHTML file and CMS Blocks
in phtml file For example my default.xml file looks like below within body tag
That's it initially it took long steps but just for the first time.
If you want to create another theme having some experience , it doesn't take too much time .
Feel free to put below any comments ,I will try to reply soon .
I am an experienced ecommerce website developer working since 2009, providing advance Magento training in Delhi/NCR focused on Module Development and Theme Development. Check our Magento course syllabus. Do contact us if you have any query


.webp)